


How To Add Quickbooks Inventory Control
QuickBooks is critical for all distribution businesses looking to keep control over their inventory. QuickBooks desktop offers a variety of tools that enable you to input, receive, and manage the outflow of inventory from your warehouse to your customers. Today you will learn how to add inventory in QuickBooks, and how to receive inventory from your vendors, and how to sell inventory to your customers.
Enabling Quickbooks Inventory Control
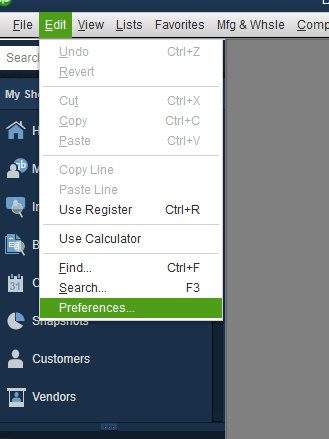
To enable QuickBooks inventory control, you go to edit and click on select preferences
On the left, select Items & Inventory. When Items & Inventory is selected, click the company preferences tab:

Within the company preferences tab check mark the “Inventory and purchase orders are active”
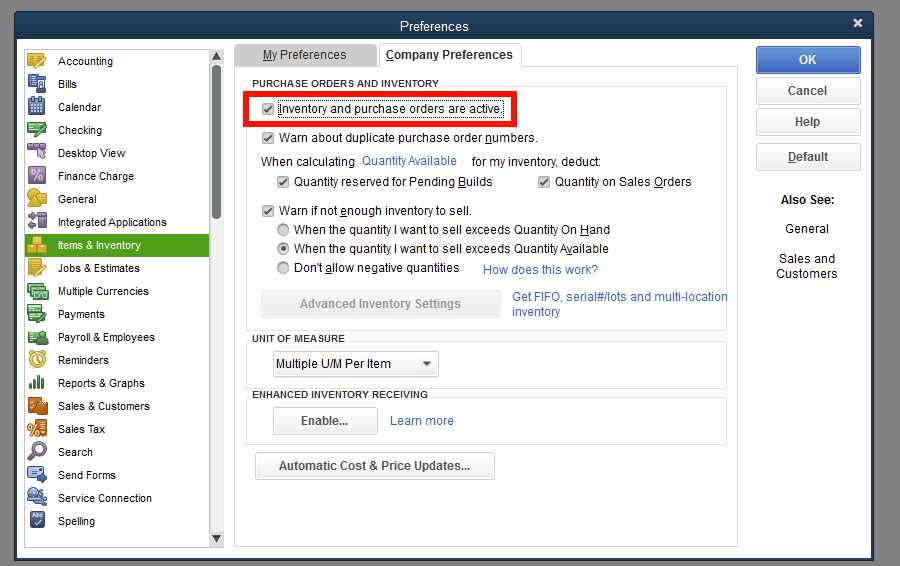
This will enable Quickbooks inventory control and allow you to begin adding your inventory parts
Creating Inventory Parts in QuickBooks
An inventory part is any item in your warehouse that has a cost, sales price and on-hand. An on-hand is a value that indicates the stock level of the item. In order to track inventory, all of your items must either be an inventory part or an inventory assembly (we’ll cover these in another post). To create an inventory part, and key in the initial on-hands, you do the following:
Go to Lists, Item List
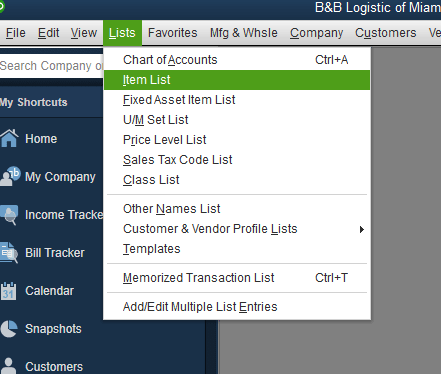
Click on Item in the bottom, and select new

Select inventory part
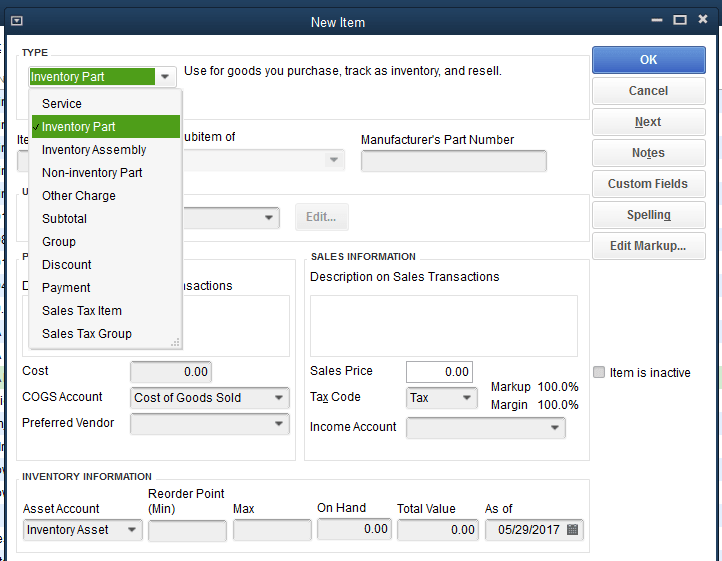
Input the Item Name, Sales Price and Income Account (Sales)
On the bottom, where it says On Hand, input the quantity on hand in your warehouse
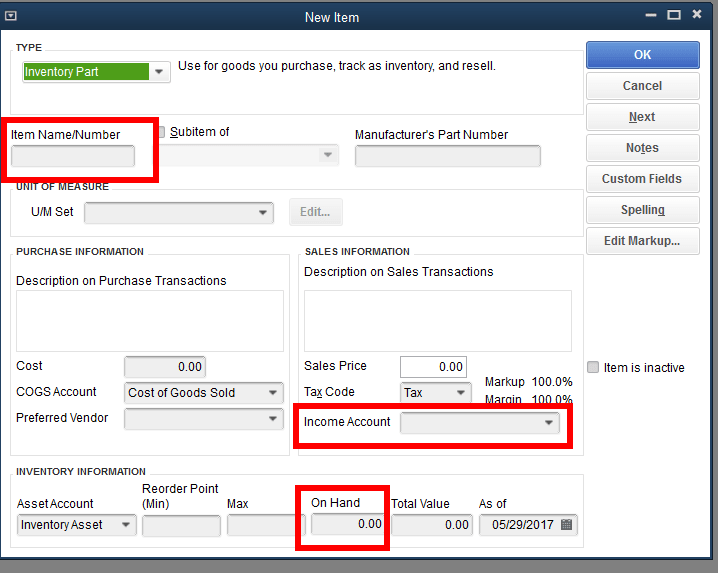
Click OK to save the product
Increasing Inventory with Item Receipts & Bills
Your job isn’t finished once the initial quantities on hand have been keyed in. Every time that inventory goes into warehouse, it must be documented to increase item’s on hand. The On Hand can be increased in two ways.
- Item Receipts
- Item receipts are utilized to increase inventory without creating an open payable to your vendor. This is used when you receive inventory from your vendor and the vendor has yet to give you a bill for the product. To create an item receipt, here are the steps
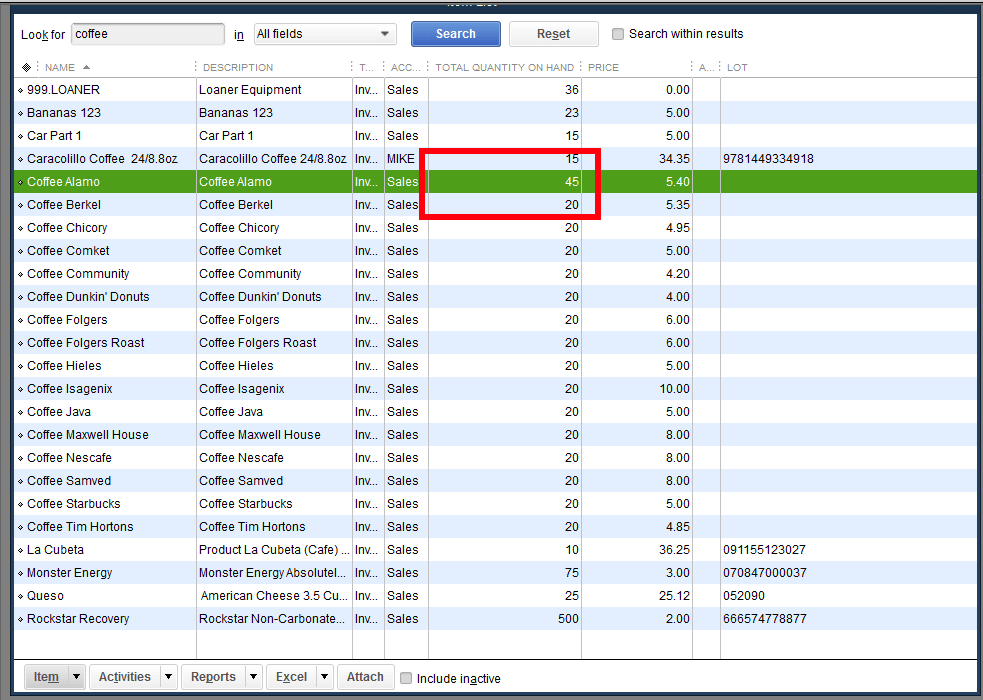
***Let’s use Coffee Alamo for this example. Coffee Alamo has its total quantity on hand equal to 20 to start***
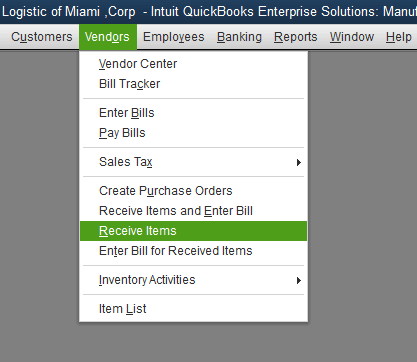
Go to Vendors -> Receive Items
Select your Vendor
Select the type in Coffee Alamo
Verify your cost and input the quantity (25 in this example)

When done, click Save & Close
Look at your on hand again for the product, and it has increased to 45
Bills
Bills are utilized to increase inventory and create an open invoice that you owe to your vendor. This is used to receive inventory when the vendor has provided a bill for the product. To create a bill, here are the steps:
Let’s use Coffee Alamo for this example. Coffee Alamo has its total quantity on hand equal to 45.
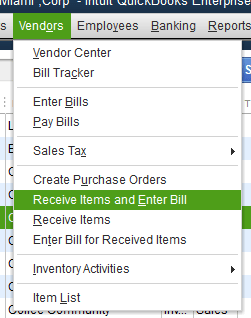
Go to Vendors -> Receive Items and Enter Bill
A. Select your Vendor
B. Select the type in Coffee Alamo
C. Verify your cost and input the quantity that you will be receiving
D. When done, click Save & Close

This will create a payable transaction for the vendor and increase your on hand to 60

Decreasing Inventory with Invoices
Invoices are utilized to decrease inventory and create a receivable transaction for your customer. An invoice is created when you deliver product to a customer, and the customer owes you money for the product. Here is how it works:
Let’s use Coffee Alamo again for this example. Coffee Alamo has its total quantity on hand equal to 60.
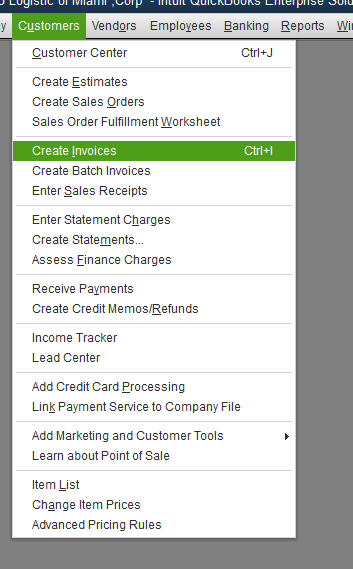
Go to Customers -> Create Invoices
Select your customer & select the item code for Coffee Alamo
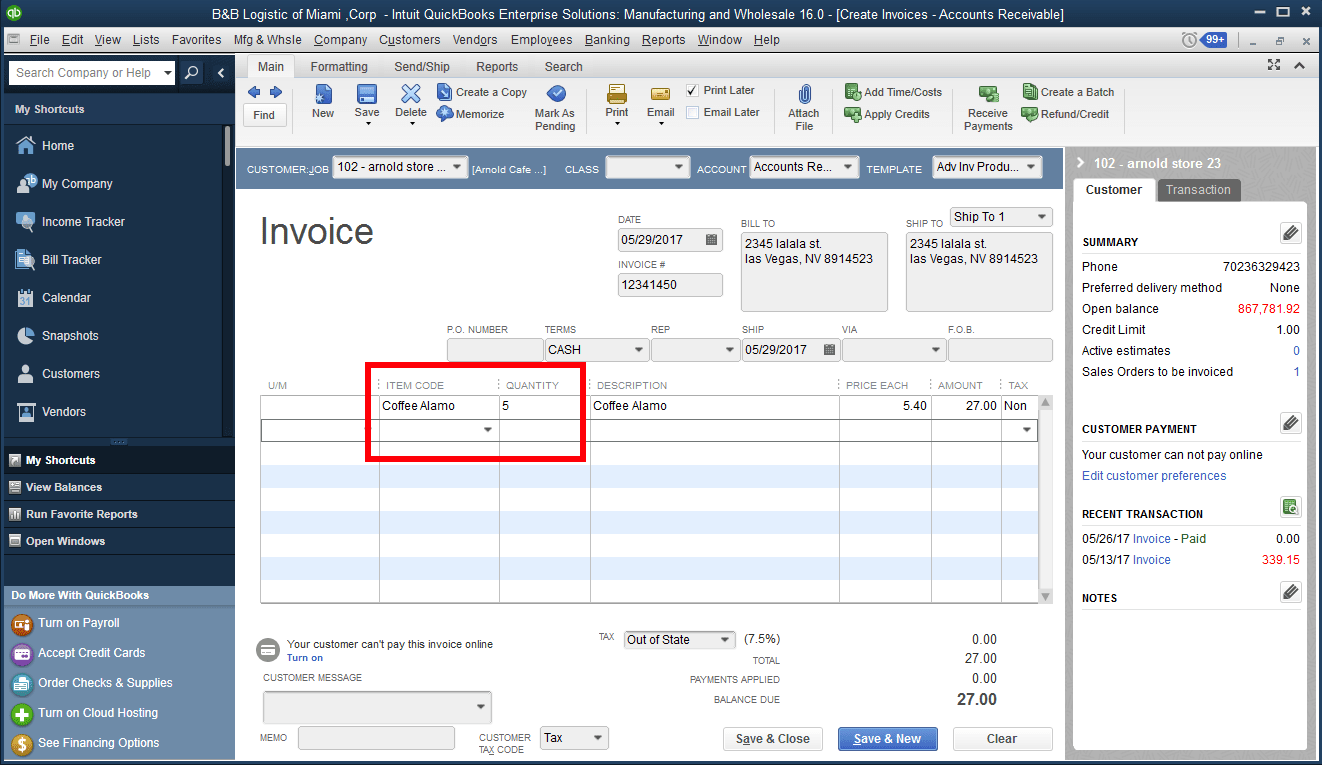
Verify your price and input the quantity that you will be selling the customer (In this case, we are selling 5)
When done, click Save & Close
This will decrease your inventory, and create a receivable for the customer.


Conclusion
You have now learned how to have a Quickbooks inventory control. Once the inventory parts have been created and added to QuickBooks, you use Bills and Item Receipts to increase inventory and invoices to decrease inventory. As long as you maintain this process, you will be able to track inventory moving forward. This will increase your sales and decrease waste and theft. In the next post, we will cover how to do weekly/monthly inventory counts to account for waste and theft.
Sorry, the comment form is closed at this time.